Wednesday, 4 December 2013

Gluten-Free Apple Crisp

My fiancee has been craving apple crisp lately, so today I thought I would treat him to one of his favorite deserts. The recipe that I usually use is filled with gluten, so I went on the search for a gluten-free alternative that would please us both. 

This simple but tasty recipe will most definitely be making its way into my regular cook book. The ingredients were easy to find - I had all of it in my pantry already and I liked that it didn't call for cups of sugar (usually makes it too sweet and high on the calorie count). The recipe was sweet, but not too sweet, which I loved. 

Gluten-Free Apple Crisp

Filling Ingredients:
6 medium apples, peeled, cored, and diced
1 teaspoon cinnamon
2 tablespoons honey
1 teaspoon lemon juice 

Topping Ingredients:
1/2 cup almond flour
1/2 cup gluten-free rolled oats
1/4 teaspoon salt
1 teaspoon cinnamon
1/4 cup honey
3 tablespoons unsalted butter

Cooking Instructions:
1. Preheat your over to 375 degrees F.
2. In a bowl, combine your apples, cinnamon, honey, and lemon juice. Stir everything together until apples are coated evenly.
3. In a separate bowl, whisk together the almond flour, oats, salt, and cinnamon.
4. Use a fork (or your fingers) to mix in the honey and butter, until the topping has a crumbly consistency.
5. Arrange the apples into a pie or baking dish. Cover with the crumble topping.
6. Bake in the over for 30 - 35 minutes - depending on how dark you like your topping to be. (I only left mine in for 30 minutes)

Cooking notes:
I used small red apples. They were a little old and soft, so the apples were not too bitter. I used a Manuka honey because I really love the flavor. If you wanted to add some crunch to this recipe, you could also add in some pecans (1/4 cup chopped). I think what was missing for me was a huge scoop of ice cream!

This recipe is so simple and fast to make! The dish is already half empty and I'm sure won't last through tomorrow - we love it! Try it today!

 Bon Appetit!

Sunday, 24 November 2013

My Christmas Gift Guide

Well, it is almost time to think about Christmas shopping! For many of you, this may  have already begun, but for the rest of us, we'll be running around for most of the month of December trying to find the perfect gifts. Since next week is Black Friday / Cyber Monday, and when I plan to do a big chunk of my holiday shopping, I thought I would pull together a list of some of my favorite holiday gifts for this year.

Last year, I tried my best to buy as much as I could from local artisans and Etsy shop owners and actually purchased most of my gifts online. Saved me from having the headache of entering the shopping mall which I absolutely loved! This year, my goal again is to try and purchase most of my gifts online - which is why I love Cyber Monday oh so much!

Here are the items that are topping my shopping list this year

1. Infinity Scarf from EcoShag
I absolutely love Tania's scarves. I own several myself and think they make the perfect gift for any women on your shopping list. I wear my scarves almost everyday! Tania offers amazing colour choices, beautifully soft fabrics and if you watch her site, she is always offering great sales!!

2. Leg Warmers from GraceandLaceCo
I have secretly been admiring these leg warmers for months and I think they are also finding their way onto my personal holiday wish list. They would look amazing on their own with a great pair of tights or jeans and just add the right touch to a great pair of boots. Fabulous for the picky teenager or college student.


3. Handmade Cheese Markers by nelledesign
If you have someone on your holiday list who loves to host a great party, then these are an absolute must. I fell in love with these handmade cheese markers a few weeks ago and just knew that they would be a great gift. They are unique, one of kind and handmade - a really amazing gift for a boss, co-worker or that fabulous chef in your family!

 4. Handcrafted Vegan Bath Set by Herbivore Botanicals
Every woman loves to take time to pamper themselves (and if they don't, they need to start!) This shop offers a beautiful selection of handmade, natural plant based products that smell amazing and make you feel fabulous. This gift set is a no brainer!

5. Beautiful Holiday Decorations from Smile Mercantile
This shop offers the most unique and beautiful gifts for the holiday lover on your list. Everything is handmade with care and comes beautifully packaged. I simply adore her creations! 

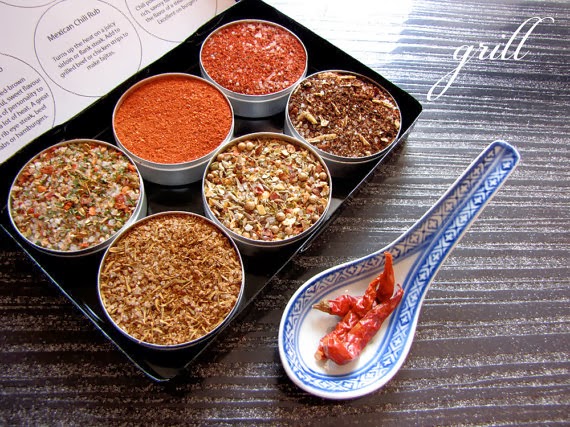
6. Gourmet BBQ rub kit from purpose design
For the man in your life or the griller in your house, this makes for a wonderful gift. These rubs are fabulous and taste amazing. This Montreal based shop also offers salts, spice kits and organic teas. 


Phew! These are just but a few of my favorites and I hope you'll check them out. As always, for the vintage lover in your life, you can find unique gift ideas in my shop - Coco&Bear Vintage!

If you haven't tried shopping online for the holidays, I strongly suggest you try it this year! Cyber Monday is fast approaching and you can find amazing deals from some fabulous shops. I'll be wearing my pj's for most of my holiday shopping this year - no malls for me!

Happy Shopping and please share some of your favorite holiday gift ideas!

Monday, 11 November 2013

Gluten Free Product Review #1

Purely Bulk Gluten Free Pizza Crust Mix


Being a gluten free foodie means that I am always on the look out for new and tasty products. Not all gluten free products are alike and some definitely taste better than others. It has taken me quite some time to find the products that I like the most but am always up for trying something new. I get very excited when I see a new gluten free product at the grocery store.

A few weeks ago, my fiancee brought home some new products kindly given to him by a colleague of his whom he had told that I was gluten free. One of those products was the Purely Bulk Gluten Free Pizza Crust Mix. 

Since receiving the product a few weeks ago, we have used it three times. 

1 - we made pizza
2 - we made flat bread
3 - we made donuts

Needless to say, we have absolutely fallen in love with this product. It is very simple to make - you only need a few additional ingredients besides what is in the package. What I love most about this product is that it produces a really flavorful and moist dough. If you have ever had gluten free bread, you may have noticed that many of them are dense and do not always have a lot of flavour, so this is why we really loved this product.

We also loved it because it was so versatile! Just follow the directions on the package to make a great pizza crust - just add your own toppings and go. We learned very easily that the dough was so tasty that you could serve it as flat bread. Instead of making pizza with the dough, just pull it apart and use it as bread for a meal or to serve with dips or salsa.

Lastly, we also made donuts with the dough. My fiancee's mother is known for making fantastic little donuts out of pizza dough. We thought we would give it a try with this pizza dough and it turned out amazing! Here is how we did it:

Step 1. Start by making the pizza dough just as it is directed on the package. You will get a nice runny (not too thick) batter.


Step 2. Get a frying pan on the stove. Pour in a good amount of cooking oil and get it nice and hot.

Step 3. When the oil is hot, use a spoon or a small measuring cup and scoop up donut sized amounts of batter and pour them into the hot oil. Try not to overcrowd them - just do a few at a time.

Step 4. Flip them over once until both sides are nice and brown then remove them from the oil.


5. In a separate bowl, mix cinnamon and sugar together. Pour this over the hot donuts to season them. 

...... Enjoy!


I would most definitely recommend this product. We will definitely continue to keep it in stock at our house!

Friday, 1 November 2013

How to Create a Vintage Style Ceremony

So, we are officially just under 8 months away from the wedding (Yikes!) Since the very beginning of this process, I knew that I wanted to bring in as much vintage style as I could to this wedding without making my modern and sleek fiancee cringe. I've been searching far and wide for ideas and pictures that will help me figure out how to perfectly blend in a vintage feel to a modern, yet romantic wedding style.

Right now, I'm really focused on my ceremony. I think there are a lot of very simple and beautiful vintage details that can be added to a ceremony. Lucky for us, we're getting married outdoors at a beautiful castle so some of these vintage touches are going to be perfect! Here are some of the ideas that I've narrowed down as my top 'must haves' for my upcoming summer wedding. 

Must have #1: A romantic signing table 

http://www.intimateweddings.com/blog/wedding-trends-sweetheart-tables/

I don't know about you, but I've seen my share of not so pretty signing tables & chairs. I often feel like this is something we just don't think about or simply leave up to the hall or ceremony location to put together... I mean, after all, it is just a table that you sit at for a few minutes to sign your official wedding document.. so no big deal right? Wrong!

Take this opportunity to add some vintage flair to your ceremony by adding a beautiful rustic table along with some high back vintage chairs. You will feel like royalty and your guests will be impressed! Remember, this is a great photo opportunity! Wouldn't you rather see yourselves sitting in something like this rather than some old plastic table with plastic chairs (scary.. but yes, I've seen it). This set up looks like it just belongs in the outdoors.. like Mother Nature herself created it! I want it!


Must have #2: A stunning backdrop

http://southernweddings.com/real-wedding/angelica-colby/

This ceremony decor makes the setting feel so romantic and warm. It is very similar to what my location looks like. At the end of the aisle, there is a bit of green space and then there is a huge cliff (seriously!). I really feel as though I need to decorate that space so it feels more closed in and inviting. 

I love the use of a vintage style dresser or table as a backdrop for the ceremony. I realize that it will probably be blocked for most of the ceremony seeing as though we will be standing in front of it, but it really helps to close off the space and gives your guests a beautiful view while they wait for the ceremony to begin. It probably isn't within my budget to use that many flowers, so I would probably go with some flowers and fill the rest of the space with other vintage decor pieces.


Must have #3 - Vintage signage

http://wistfulweddings.tumblr.com/post/41671540484

The thought of spending any part of our wedding budget on printing programs, which in my opinion, are skimmed over and rarely ever kept (mine usually end up at the bottom of my car or scrunched up in my purse) makes me very unhappy. I do think it is nice to have something that people can read which tells them a little about what they can expect from the ceremony, but let's be honest.. a ceremony is a ceremony.. what do you really need to know? 

I love this simple yet beautiful idea! Write all you need on a chalkboard and put it in a lovely vintage frame. Even if you don't use a chalkboard, there are many amazing companies which will print something similar out for you and you can just put that in a frame. Place it at the front where everyone will enter.. and that's it! No paper, no big printing costs and let's face it, less waste! We're saving the planet here folks!

http://www.weddingchicks.com/2012/01/24/winter-wedding/

So this may not be a true 'vintage' inspiration, but there is something about this sign that feels very old fashioned to me. This little boys outfit also makes it feel timeless and sweet. We are blessed to have our two little nieces acting as jr. bridesmaids in our wedding and we were struggling with finding something that they could do for the ceremony and I think I may have found it. 

I love the idea of having a little one walk this sign down the aisle just before you come out. The burlap is very simple and gives it a very rustic feel - perfect for the outdoors. I'm lucky there are two ends to this stick so the girls won't have to fight over who gets to carry it down the aisle! They can just hold either end and hopefully walk (without fighting) down the aisle! 


For more vintage style wedding ideas, be sure to check out my Pinterest board!

Tuesday, 22 October 2013

Celebrating Halloween Vintage Style

Halloween is fast approaching and who says that you can't celebrate it vintage style?! I have to admit that Halloween has never been my favorite holiday. As a child, I could just never really get in to the whole dressing up thing... what's wrong with me?! As an adult, I cringe when I hear 'costumer party'. 

I do however LOVE sitting at home with a bowl full of candy and hearing those adorable little voices at my door saying 'Trick or Treat'. That's the best part of Halloween for me. For all of you Halloween lovers, here are just some of my personal spooky favorites from some of my most favorite Etsy shops!


1. Antique Cast Iron Cauldron from wretchedshekels

2. Vintage Wall Mirror with Wood Frame from robertagrove

3. Vintage Glass Apothecary Bottle from thirdshift

4. French Maid Mini Dress from dotto 

5. Antique Bisque Legs from becaruns 

6. Antique Celluloid Doll from becaruns 

Wednesday, 25 September 2013

Should the Bride Wear Vintage?

Well it has been almost two months since I last posted (eek!) I got engaged and well, it has been a whirlwind of activities and of course, my blog fell to the side. I'm sorry!

I'm knee deep in wedding planning! We've got the venues booked, photographer chosen, wedding party selected and we even found our reverend. Next... finding me a wedding dress! Oh dear. 

I think the question I have received the most since being engaged is "Are you going to wear vintage?" Because I run my own vintage shop, most would assume that my wedding would have a lot of vintage inspired pieces... and it will... just not sure that I want it to be my dress. 

There are a lot of pros to wearing vintage! 

1 - Make a statement: Wearing vintage can really let you get creative and will definitely help you to make a statement on your wedding day. The fabrics are unique and the styles are iconic. 

2 - Show your personal style: Because vintage dresses cover so many decades of amazing styles and trends, you can easily find a dress that matches your personal style and the theme of your wedding. Maybe you're a fan of the 1920's flapper style cap veil or love the retro feel of the 70s. I personally love the post-war inspired lace!

3- Save on your budget: Vintage dresses can also be very affordable so it might be just the thing you need to help with that tight wedding budget. You might just find your perfect dress in your mothers closet! If not, shop at a thrift store; check your local paper for estate sales or garage sales; or shop online! There are many Etsy shops that offer beautiful vintage dresses at a great price!


In the end, your wedding dress needs to not only be a representation of who you are, but you need to feel beautiful and comfortable in it. If you're thinking of going vintage, get out there and find some local shops where you can try some on. You really cannot find a better made dress and the styles... well, they speak for themselves. As for me, well, I can't tell you what I'm going to do and even when I do pick my dress, I still can't tell you what I decided. For now, I'll leave you with some of my favorite vintage dresses that I will most definitely be looking for during my shopping trips!


I love everything about this outfit - the birdcage, the tea length dress and those shoes!


I would feel like Grace Kelly in this dress. Timeless and so beautiful!


There is something so sexy, yet classic about this look. Simply jaw dropping...

Love this tea length classic. Adore the lace and the bow.

UPDATE: Want to see what the bride ended up wearing? Check out this updated post!

Tuesday, 30 July 2013

Dairy-Free & Gluten-Free Mini Donuts!

I found this recipe a few months back when I was desperately seeking something sweet to eat. Being dairy and gluten-free definitely has its challenges, especially when you have a sweet tooth. I stumbled across this recipe on Pinterest and thought I would give it a try one night. 

These delicious little bundles of joy were so easy to make and were so tasty that I had to make them the following week for my monthly girls night. I figured they would be honest and tell me if these were just another yucky gluten-free recipe that I was trying to pass off as being good. (I do that a lot) I was so happy when they all said they liked them! Now, let's be honest - they won't pass for a Tim Hortons timbit or anything but, for what they are, I thought they were pretty tasty! These are definitely worth a try!


Gluten-Free & Dairy-Free Mini Donuts

Ingredients:
 1 cup of water
6 tbsp dairy free butter
10 drops of vanilla stevia or tsp sugar
1/2 cup brown rice flour
1/2 cup gluten free all purpose flour
1/4 tsp baking powder
3 eggs
cooking oil (preferably vegetable oil)

1 1/2 cup powder sugar
2-3 tbsp of water

Directions:
Combine water, butter, and stevia (or sugar) in a saucepan. 
Bring to a boil, stir to combine.
When butter is dissolved, add the flours and baking soda. Stir it all together to bring it into a ball.
Turn off the heat and allow the dough ball to sit for 5 minutes to cool slightly.
Add eggs one at a time to the dough ball and stir to combine completely before adding the next egg.

Pour cooking oil into a pan. Make sure you add enough oil so that when you drop your mini donuts into the oil, it will cover them. Heat the oil to 375 degrees.

I used a small spoon to make these. You will scoop about 2 tbsp of dough into the oil. Do this in batches, but don't overcrowd the pot. Turn the donuts over when they begin to brown. Keep the moving until they appear crispy on the outside. Remove and place on a paper towel to soak up the oil. Leave them to cool slightly. Continue until you've used up all of your batter.

While the donuts are cooling, combine the powder sugar with the water - but only add one tbsp of water at a time and stir. You want the glaze to be thick so it will stick to the donuts. When ready, dip the donuts into the glaze and let them sit to cool completely. Then... enjoy!


Tip 1: After making these the first time, I decided to add some cinnamon to the mixture. This gave them a little more sweetness which I loved. The next time I make these, I was going to try adding raisins as well. Heck - you could even coat these in chocolate!

Tip 2: If you are at all like me and have no real experience frying donuts, my tip would be to leave them in just a little bit longer than you think they should stay in. I really didn't know how long they would need. At first, I would remove one and open it to see if it was cooked enough. Trial and error - you'll figure it out!

I have to give credit to the original author of this recipe! Check out the Non-Dairy Queen for this and other excellent recipes!

Enjoy folks! 


Thursday, 18 July 2013

Creating a Vintage Inspired Planter Box

So it has been a while since my last post... wedding planning has well, taken up most of my free time! Who ever said that planning a wedding was easy has either never planned one or drank a lot during the process! I hope to post more about wedding plans as I have more to share.. stay tuned!

For now, I wanted to share with you some cleaver ways to create a vintage planter for your yard or inside your home. I was inspired to do this post because a few weeks ago my fiancee pulled me into the backyard to show me something he had done. When I got back there, I found this adorable planter filled with some of his favorite hot pepper plants. 


Let me give you a little bit of back story for how this came to be. Earlier this year, my mother gave me her great grandmothers vintage Singer Sewing Machine complete with its original stand and table top. I decided that the entire piece was just too big to store in the house (and too heavy!) so my mother and I took apart the table portion and are just keeping the legs and the machine itself. I gave my fiancee the left over wood table and wood cover which we were going to throw away. 


I'm going to take a little bit of credit here and assume that it is because of my influence that he saw that wood cover and immediately knew that it could be used for something great. He brought it out back, filled it with soil and planted his favorite peppers in it. What a great use for an old piece that would have just ended up at the curb!!

When he showed me it, I was elated! I was so proud that he had thought to make something out of it and was also just pleased to see that my great, great grandmother's sewing machine cover was still going to be around and we could enjoy it. 

Here are some other simple and crafty ways to create your very own vintage planter box. Next time you hit a yard sale or a second hand store, keep your eyes open for some of these unique pieces!

1Vintage Crates
I'm obsessed with vintage crates. I use them all over my home and am always looking for new ways to transform them into something great. 


2 - Vintage Toy Cars
I love vintage toys and it isn't that hard to come by some old Tonka trunks that you can re-purpose into beautiful planters! Might be a great decor item in your child's bedroom.


Ok, these aren't exactly vintage, but you get the idea!

3 - Vintage Car Parts
My parents are always finding old, rusted car parts on the side of the road and can never resist picking them up. What is great about that is you can transform them into something original like this!


4 - Vintage Pots
I can never resist these beautiful french inspired pots. They make beautiful centerpieces for your table and now even better planters!

Friday, 21 June 2013

Saying "I Do" in Vintage Style

I'm so excited to announce that on June 6th, my boyfriend proposed! And... I said YES!
Yes, I'm finally ENGAGED! I say finally because.... well, I'm not in my 20s anymore and we've been together for three wonderful years, it is just about time for me.

Soooo much champagne!
He took me out to a great restaurant in the Distillery District in downtown Toronto. He got down on one knee and asked me to marry him! Through my tears, I managed to say yes and have been blissfully happy (and on the verge of tears) ever since.

The best part (of course) is the amazing engagement ring he gave me. It is always about the ring!

My vintage Juliet 1930's Art Deco engagement ring

When we first started talking about getting engaged last year, he asked me what kind of ring I wanted. Well, of course, I said I wanted a vintage ring. It was such a simple and easy decision for me to make. I knew that I didn't want a giant, mass produced, what every other girl has, type of ring. I wanted something unique and that when you looked at it, you would say 'oh, that's totally Kim'.

My boyfriend very quickly realized that finding a vintage ring wasn't all that easy. We started browsing online and found a lot of great shops... but they were in New York, not Toronto. Buying a ring online just didn't seem like a good idea and taking a trip to New York just wasn't in the cards. So... we kept searching and were so lucky to have discovered Antiques on King right here in downtown Toronto. We went in and were amazed to see that they had hundreds of stunning vintage engagement rings for us to choose from - it was quite overwhelming for me! We sat down, and my boyfriend (who has amazing taste) quickly found one that caught his eye and asked if we could try it on. That was the ring... the very first one he picked out. We tried on many others, but always found ourselves coming back to that same ring. It was just perfect and fit me like a glove. It was meant to be.

So, now begins the planning. My fiancee is very modern, while I'm more on the vintage side. We plan to create a wedding that beautifully combines both of those elements. Here are some of my inspiration pictures that I've pinned on Pinterest.

Find these and more vintage wedding inspiration photos on my Pinterest account
I'm so excited about this next year! Not only do I get to marry the man of my dreams, but I get to plan the party of a lifetime.

Monday, 3 June 2013

How to Create a Successful Vintage Etsy Shop

This past week, my shop Coco&Bear celebrated its 1 year anniversary. I cannot get over how quickly this year has gone by. I opened by vintage Etsy shop because I love vintage, I was ready to try something that was just my own and I wasn't afraid to take a chance. I took a huge leap of faith, opened my shop with really no idea how Etsy worked, had only a small stock of vintage to start and off I went. I am by no means an expert at this. I learn something new almost everyday and have found this experience to be one of the most rewarding things I have done in my entire life. I'm going to share with you just a few of the many important and fundamental lessons that I have learned during my first year.

1 - When it comes to vintage, knowledge is key.
Although I had always had an interest in vintage, I could not say that I knew a lot about the different types and could not date an item simply by looking at it. In order to buy good items for the shop, I had to become more knowledgeable... and fast! The question was.. how?


- Ask your sellers! The people that you are buying from probably know quite a bit about the vintage item you are purchasing from them. Ask them where they got it? Do they know much about the product/item? They can often tell you so much and help you to learn more about what you are selling. Don't be afraid to not know the answer!

- Take advantage of the Etsy community. There are so many wonderful sellers on Etsy. When I was just starting my shop, I browsed through Etsy to locate other vintage shops that I admired. I would contact the owners to let them know that I was new and ask any questions that I might have. I got some great tips and met some great people - many of whom I am still in contact with. You are not alone in this, there is a great community of people out there to help. 

2 - Don't be afraid to spend.
As the old saying goes, you need to spend money to make money. In order to build your shop, you need to get out there and buy great vintage items. Customers need to find your shop, so having a good variety of great vintage items will draw them in. Be ready with a solid budget that you can spend. You will probably not start seeing a profit straight away, but be patient and give yourself and your shop the time it needs to stand on its on two feet. As with any good business, it takes time to build a client base so be patient with yourself.


3- Learn the art of photography.
I am always flattered when people ask me who takes the photos for the items in my shop - because the answer is that it is me and they are usually surprised and follow up with "are you a photographer?" Photography has been a key component to my success this past year. I am not a photographer and you don't have to be either! Just start shooting...


- Find your style. I learned very early on that finding a style of photography for your shop is very important. I stalked many vintage shops that I loved and over many months tried different techniques and mimicked different styles until I finally found a style of photography that worked for me. I use natural light and a simple white background with a rustic white table (which I built with the help of a few friends). The goal is to find a style that reflects the type of items you are selling and one which you feel is beautiful. Don't hesitate to keep trying new styles until you find one you like and ask other sellers what they are doing.

- Start shooting. You do not need to run out to the store and buy the most expensive camera you can find. For the better part of this past year, (I can't believe I'm about to reveal this) I used my Samsung tablet to take all of my photos. This is by no means a 'fancy' camera. I would then use a Photoshop program that was already on my computer to adjust the lighting and shading of the photos and that was it. You don't always need fancy equipment to take a beautiful photo. Try different angles, take more shots than you think you need and don't be afraid to play with props - I love props!  


I have encountered many people throughout this past year who have said to me "you own an Etsy shop? oh, that's so cool, I've always wanted to do that". I quickly ask them why they haven't. We all make so many excuses for not chasing after the things that really make us happy. So if you are one of those people who have always dreamed, but never taken the leap, I hope that some of these suggestions will help to make that first step just a little easier. 

This has been an amazing year. My goal was to sell 100 items and I surpassed that, selling 150 items just in time for my 1 year anniversary. I've met some amazing people and had some very loyal and friendly customers. My goal for this next year is to make it to 400 sales (a pretty big goal.. I know!) I want to continue to offer my clients unique and beautiful vintage finds! 

So what I'm trying to say is that you don't have to be an expert! Starting with a love for vintage is what really counts. You simply learn as you go!

Thursday, 23 May 2013

My Favorite Gluten-Free Chocolate Granola Recipe

This recipe is by far one of my favorites. The reason I love it so much is because first of all, it is SO easy to make and secondly, it is so good! When I eat it, it makes me feel like I'm cheating - like I'm having a candy bar - but I'm not! I got this amazingly tasty recipe from my 'can't live without' Naturopath, Jen Newell. She is always sharing amazing recipes with me (I'm so lucky!). Well.. here it is!


 Gluten-Free Chocolate Granola

Ingredients:
2 cups gluten-free rolled oats
1 cup unsweetened, shredded coconut
1/2 cup chopped almonds
1/4 cup raw cacao powder
1/2 cup raw honey or maple syrup
1/2 tsp vanilla extract

Directions:
Preheat the over to 250°C
Mix all ingredients together in a bowl
Then spread the mixture out on a baking sheet lined with parchment paper
Bake in the over for 35 - 40 minutes or until the granola is dry and crunchy
Let it cool and then store in a sealed container


Tip 1: I use the Only Oats brand of gluten-free oats. I featured this product in a previous blog post. I buy it at BulkBarn - that is where I have found it to be the cheapest and they always seem to have it in stock. You can most likely find it at any health food store. 

Tip 2: I find the unsweetened, shredded coconut at Whole Foods in the bulk aisle. I really find that buying the unsweetened variety makes a big difference in this recipe. If you were to use a sweetened coconut, the granola would be way too sweet and the coconut would just overpower the chocolate. I would stick with an unsweetened brand.

Tip 3: I don't buy chopped almonds - I just take whole almonds, throw them in my Magic Bullet and give them a good grinding. If you would like to have larger chunks of almonds in your granola, don't grind them then and just break them into smaller pieces. 

Tip 4: The type of honey you use can really make a big difference in how sweet the granola turns out. This is just something that you have to try out for yourself to see which kind you like best. I've settled on using the President's Choice (Canadian brand) regular honey. When it comes to honey, just make sure that you're using an organic, natural honey that has no additional sugar added. **I recently started replacing the honey with organic maple syrup and I love it!

Tip 5: When it comes to baking time, this all depends on whether you want your granola to be soft and gooey or hard and crunchy. If you want it softer, don't leave it in as long. The longer you leave it in, the harder it will get.

I usually find myself making at least one batch of this granola each week. I use it as cereal (just add milk.. well, almond milk for me!), I pack it as a snack when I'm on the road, and it really helps whenever I'm having a chocolate craving or just need something sweet. I guarantee that if you have kids, they will love this! 

You can always feel free to add any other ingredients that you want! Maybe some other kind of nuts, raisins or dried fruit. You really can't mess this up.. it's always good!

Enjoy!


Check out more recipe's from Jen and more information about her services at www.newellnd.ca

Thursday, 16 May 2013

5 Ways to Repurpose a Vintage Pallet

Last year, we decided to renovate our backyard and it was my job to search for some furniture. As I left my home one early morning on my way to a meeting, I noticed a rough but beautifully vintage pallet sitting at the end of one of my neighbours driveways. I had no idea what I would do with it, but I knew I had to have it. I quickly called my boyfriend and told him to get out there with the truck and pick it up! Thankfully he did...
 
When I finally got a look at it, I realized that it was a great old pallet from the Royal Canadian Mint in Winnipeg, Ontario, Canada. It was rugged and a little rough around the edges, but that's why I liked it. I decided that it would be our coffee table. We quickly grabbed four casters and placed them on the bottom of the pallet... and well, we had a coffee table! We really didn't do another thing - it was that easy!


I'm determined to find a new (and maybe more challenging) pallet project for this summer. Pallets are great to work with - you can find them almost everywhere, they are pretty sturdy and they are usually free! Here are 5 great pallet projects that you can try this summer!